The following is a simplified ichromα-handling tutorial using a CRP test as an example.
A more detailed tutorial can be found in the ichroma manual.
![CRP-Testverfahren Piktogramm: Gerät einschalten](https://www.ichroma.at/wp-content/uploads/slide0.jpg)
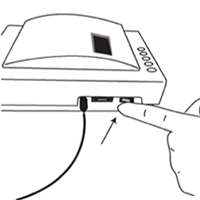
Step 1: Turn the device on.
![CRP-Testverfahren Piktogramm: ID Chip Einführen](https://www.ichroma.at/wp-content/uploads/slide1.jpg)
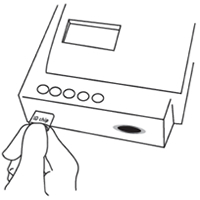
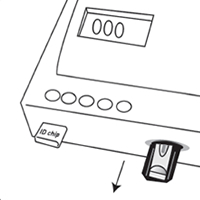
Step 2: Insert the ID chip (test method) into the ichroma reader.
![CRP-Testverfahren Piktogramm: Probenentnahme](https://www.ichroma.at/wp-content/uploads/slide2.jpg)
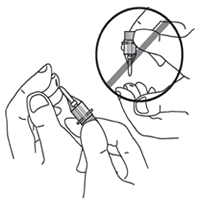
Step 3: Remove the sample by holding the collector horizontally to the finger.
![CRP-Testverfahren Piktogramm: Vermischen von Probe und Detektorlösung](https://www.ichroma.at/wp-content/uploads/slide3.jpg)
Step 4: Puncture the detector solution by inserting the sample collector until you hear it “click.”
![CRP-Testverfahren Piktogramm: Vermischung von Probe und Detektorösung](https://www.ichroma.at/wp-content/uploads/slide4.jpg)
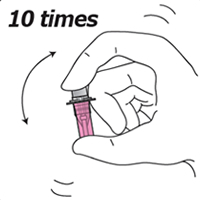
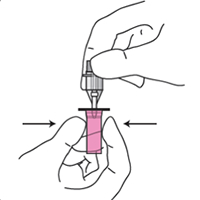
Step 5: Mix the sample/detector solution by shaking.
![CRP-Testverfahren Piktogramm: Befüllung des Teststreifens](https://www.ichroma.at/wp-content/uploads/slide5.jpg)
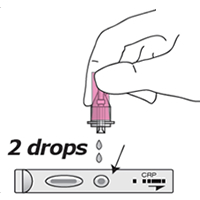
Step 6: Add 2 drops to the test strip.
![CRP-Testverfahren Piktogramm: Einführen den Teststreifens in das Lesegerät](https://www.ichroma.at/wp-content/uploads/slide6.jpg)
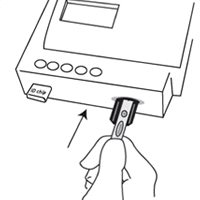
Step 7: Insert the test strip into the reader.
![CRP-Testverfahren Piktogramm: Resultat erscheint am Display](https://www.ichroma.at/wp-content/uploads/slide7.jpg)
Step 8: Results are displayed in three minutes.